Friday, 23 January 2015

Hello again,
 Here is my second post of 2015 and it is of two postcards I made for the Chocolate Baroque postcard swap. The theme I chose from those offered was caramel ( not having any stamps suitable out of the large number I own for the alternative). I really had to think hard about this as I was somewhat out of my comfort zone, however, these are what I came up with.


The one on the left was stamped on to shiny card using vintage sepia Versafine ink coloured with distress inks in tea dye and vintage photo and mounted on to a buff background. The corners were cut from craft card using a Sizzix die. The second card was cut from craft card onto which I sewed a piece of calico that I had dyed with tea. The image was a Chocolate Baroque stamp the name of which escapes me but it resembles a mediaeval plate.The "lace" edging was cut from craft card using a Sizzix die and the circles were stamped using a bottle top and tea dye ink. The word caramel was stamped using buttermilk paper and a tiny alphabet stamp from my stash. Hopefully they will be acceptable, but hey, according to one famous crafter "there can be no mistakes in art."
See you again soon.


Saturday, 10 January 2015

Happy New Year!

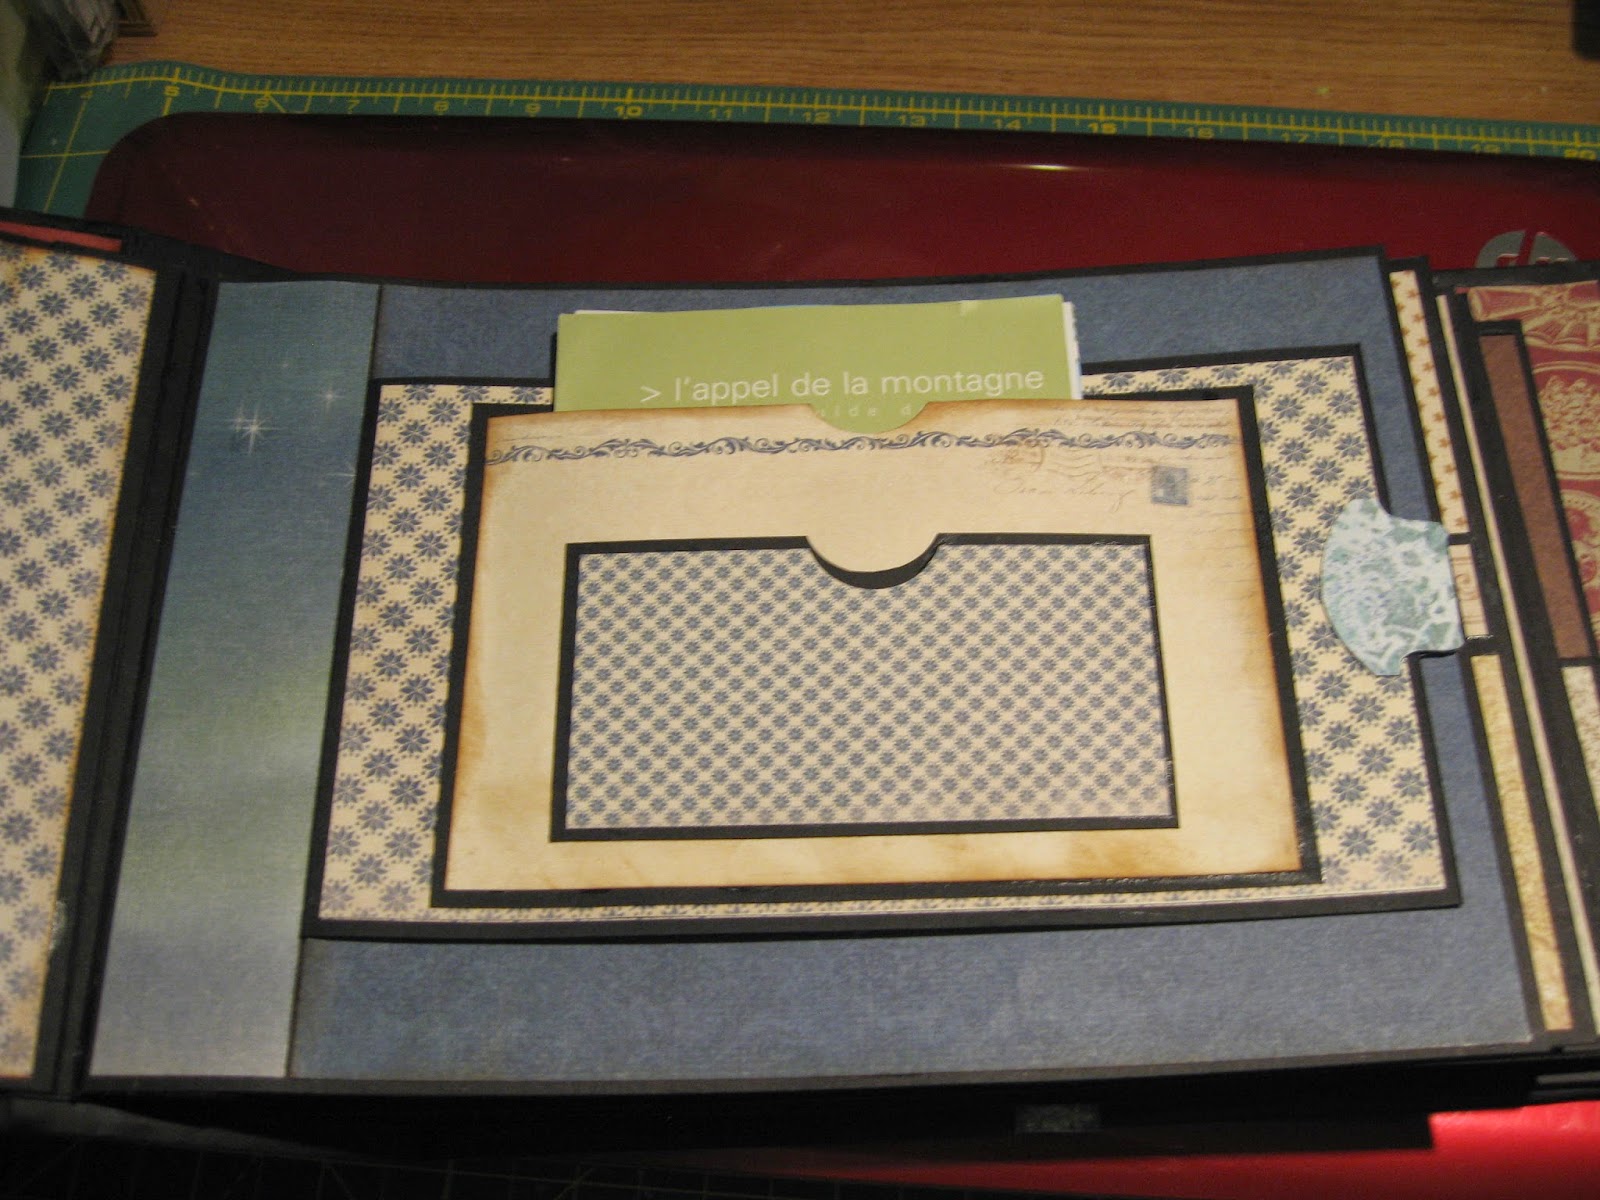
Here is my first post of 2015 and it is of the album that my daughter asked me to make for her husband's Christmas present. This album is for holding keepsakes of their various skiing holidays. I made the skeleton of the album following a tutorial by Clare Charvill of mycreativespirit.blogspot.co.uk and added Pion Design papers called Wintertime in Swedish Lapland. These double sided papers have beautiful vintage images alongside typically Scandinavian designs and snowflakes. I felt they were very suitable for the snow and skiing theme.
The basic cover before embellishing.

Page 1


Fold out page with hidden pockets.


Small envelope pocket.


Vertical fold out page closed with a magnet.


I won't bore you with more photographs, but you get the  general idea? I really enjoyed making it and the recipient seemed very pleased with his gift.

The finished article.


I hope you enjoyed your visit here. See you again soon.

Wednesday, 17 December 2014

Christmas Traditions.

Most families have their Christmas traditions; little rituals that are carried out year after year and our family is no exception.


It was a long held tradition  at tea time, when we used to go  to my parents in law for boxing day celebrations, that there would be some extra small gifts for everyone. These were always concealed in either a fairy house or a pretty fairy mushroom that had pride of place on a 
beautifully laid dining table adorned with the very best bone china and glassware. Meals taken here were somewhat formal affairs, and didn't happen that often other than special occasions. Sadly they are no longer alive and it has been up to us as the now senior family members to uphold our own traditions. This year we have the joy of hopefully being joined by our first grandchild Emily (that is if everyone else is cold and bug free). We have to be sensible about infection around her as she has HLHS.

I decided at the last minute to make my own house for her ( I know she is too young to understand this year but it should last for a few years to come). It has been a labour of love but has gone together quite well, with a little help from my husband where mathematical calculations and construction tips were needed. It took 10 sheets of 3mm A4 chipboard, some gold acrylic paint and a selection of  Kaisercraft paper that I had left over from last year. I also used  scraps  of red and yellow cardstock, Scor- tape, hot glue, glossy accents and stickles. The shingles for the roof were made using a Martha Stewart lace edge punch and made to glisten like frost by using crystal embossing powder and a heat gun. Unfortunately, the photographs do not do the house justice as the light wasn't coming from the right direction to enable good photographs. Nevertheless, here is a selection.


I hope you like it as much as I enjoyed making it. I will have another project to show you after the festive season, but need to wait until the recipient has seen it first. Here's wishing you a very happy Christmas and New Year.

Monday, 22 September 2014

MIA.

I guess you all thought that have been missing in action or AWOL. The truth is that I have had a really busy year, and blogging has had to take a back seat for a while. Just before Christmas, we learned that our expected first grandchild had been diagnosed at the 20 week scan with a serious heart defect (HLHS) this means that she would only have half a working heart and that she would need an eight hour operation shortly after birth. This came with no guarantees and all we could do was hope and pray for her survival and recovery. I am pleased to report that Emily was born weighing just 5lb 5ozs on the 23rd April this year and underwent her first surgery at 6 days old. To date she is doing very well,and is awaiting the second of the three operations needed to hand make her a heart. She is very cute and has a very good set of lungs on her which she uses to full advantage to let her parents know when she's not happy about something! 

In February, courtesy of monetary birthday and Christmas gifts from the family, I signed up to do a weekend craft retreat with the very talented and patient Clare Charvill of My Creative Spirit. Claire has a blog and online shop, which can be found at Mycreativespirit.blogspot.com . Her work is amazing and she is an ambassador for Graphic 45. I had never taken a workshop of this nature before, and was amazed at the amount of work some people managed to get through during the weekend. Needless to say I was very slow so didn't manage to complete the project which was an album using the Couture Graphic 45 paper collection. However, I intended to finish it later. This turned out to be much later as the events detailed above rather overtook me.
Here are some photographs of the Couture Album made during the February craft retreat.


I have long been fascinated by the construction of albums and learned a great deal during the retreat. So much so that when my daughter requested me to make an album for her, I was able to oblige and will post the pictures next time.

Thanks you for stopping by.


Wednesday, 12 February 2014

At last, it's only taken a year!

Having received my first consignment of tags for this year's Chocolate Baroque tag swap, I remembered that I still hadn't made a suitable display for my 2012 Alphatags so my challenge this week was to make something that would set them off in a complimentary fashion. 

Looking through them for inspiration, I was once again amazed by their beauty and the range of colours, not to mention the artistic talents of the ladies who had slaved over them in order to meet the given deadlines. The idea I came up with was a display album  made from black 270 gsm card stock with a chipboard cover. Each internal page  has a pocket big enough to hold 2 tags. I left the pages black but painted the edges of the chipboard cover in black acrylic paint to match and then added  papers from the Prima firefly collection (which I purchased from Chocolate Baroque a long time ago and have been stroking ever since) a handmade flower and some  leaves. All the pages including the cover have rounded corners. Finally I added a small sparkly acetate butterfly that I have had in my stash for years and made a dangly charm to fix to the spiral binding. 


I bought a Zutter Bind-It-All second hand from e-bay several years ago and this is the first time of using it. It wasn't as successful as I would have liked as some of the rings came out a little mis-shapen however given that it was the first attempt I wasn't too disheartened. I used 1 inch O rings but because of the finished depth of the album, I could have done with 2". Unfortunately the largest size they make is 1.25 inches so perhaps a different binding method would be better. Back to the drawing board on that one I guess.


The last task was to insert an eyelet in both the front and back cover, thread with pink seam binding and tie in a bow. Job done!

I hope you enjoyed looking at my endeavours for this week, I have another project on the go which I hope to share with you soon. Thanks taking the time to call in.
Gill x

Tuesday, 17 December 2013

Christmas Cards

Here is a selection of the special cards I made this year for my family.


They were made using a mixture of water colouring, stamping, embossing and fussy cutting. At one time I used to make all the Christmas cards I sent, but with that being around 120 + I now only make for those I know will appreciate them (family & close friends) for the rest I buy charity cards. The rush to finish is now almost over, only 8 more sleeps to go!! At the risk of being accused of plagiarism (from Strictly Come Dancing) Keep crafting!

Sunday, 15 December 2013

 Only ten sleeps to go!

I know that Christmas is nearly upon us but that doesn't stop people from having birthday celebrations,so I wanted to share a birthday card with you that I recently made for a male friend who owns and sails a boat regularly.

It was stamped with Scene-it stamps from Hobby Art Stamps on W. H. Smith watercolour paper and coloured with Tombow pens and Tim Holtz distress markers used as watercolours. I mounted it on shiny blue card and then onto the card itself.


I hope you like it.